> For the complete documentation index, see [llms.txt](https://arcsky.gitbook.io/x55-public-knowledge-base/llms.txt). Markdown versions of documentation pages are available by appending `.md` to page URLs; this page is available as [Markdown](https://arcsky.gitbook.io/x55-public-knowledge-base/aircraft-description-and-functions/herelink-controller.md).
# Herelink Controller
All standard package X55 units come with the Herelink Controller by default.
{% hint style="info" %}
For more information about the Herelink Controller, please refer to the [Herelink documentation](https://docs.cubepilot.org/user-guides/herelink/herelink-overview).
{% endhint %}
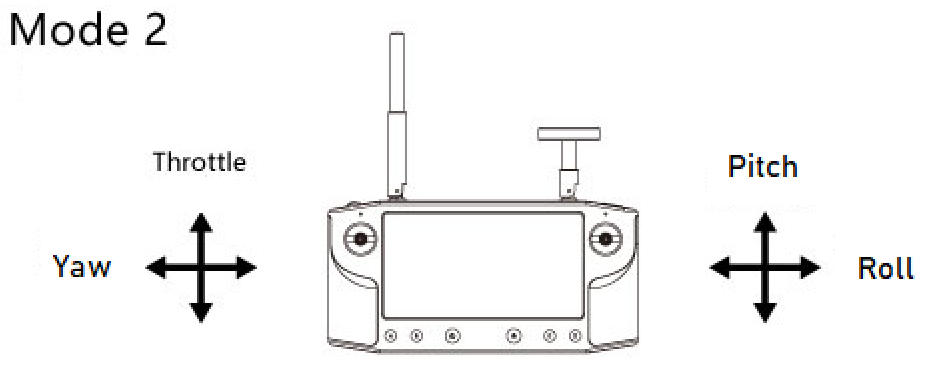
By default, the Herelink is set up as a Mode 2 configuration.
## Configure Buttons
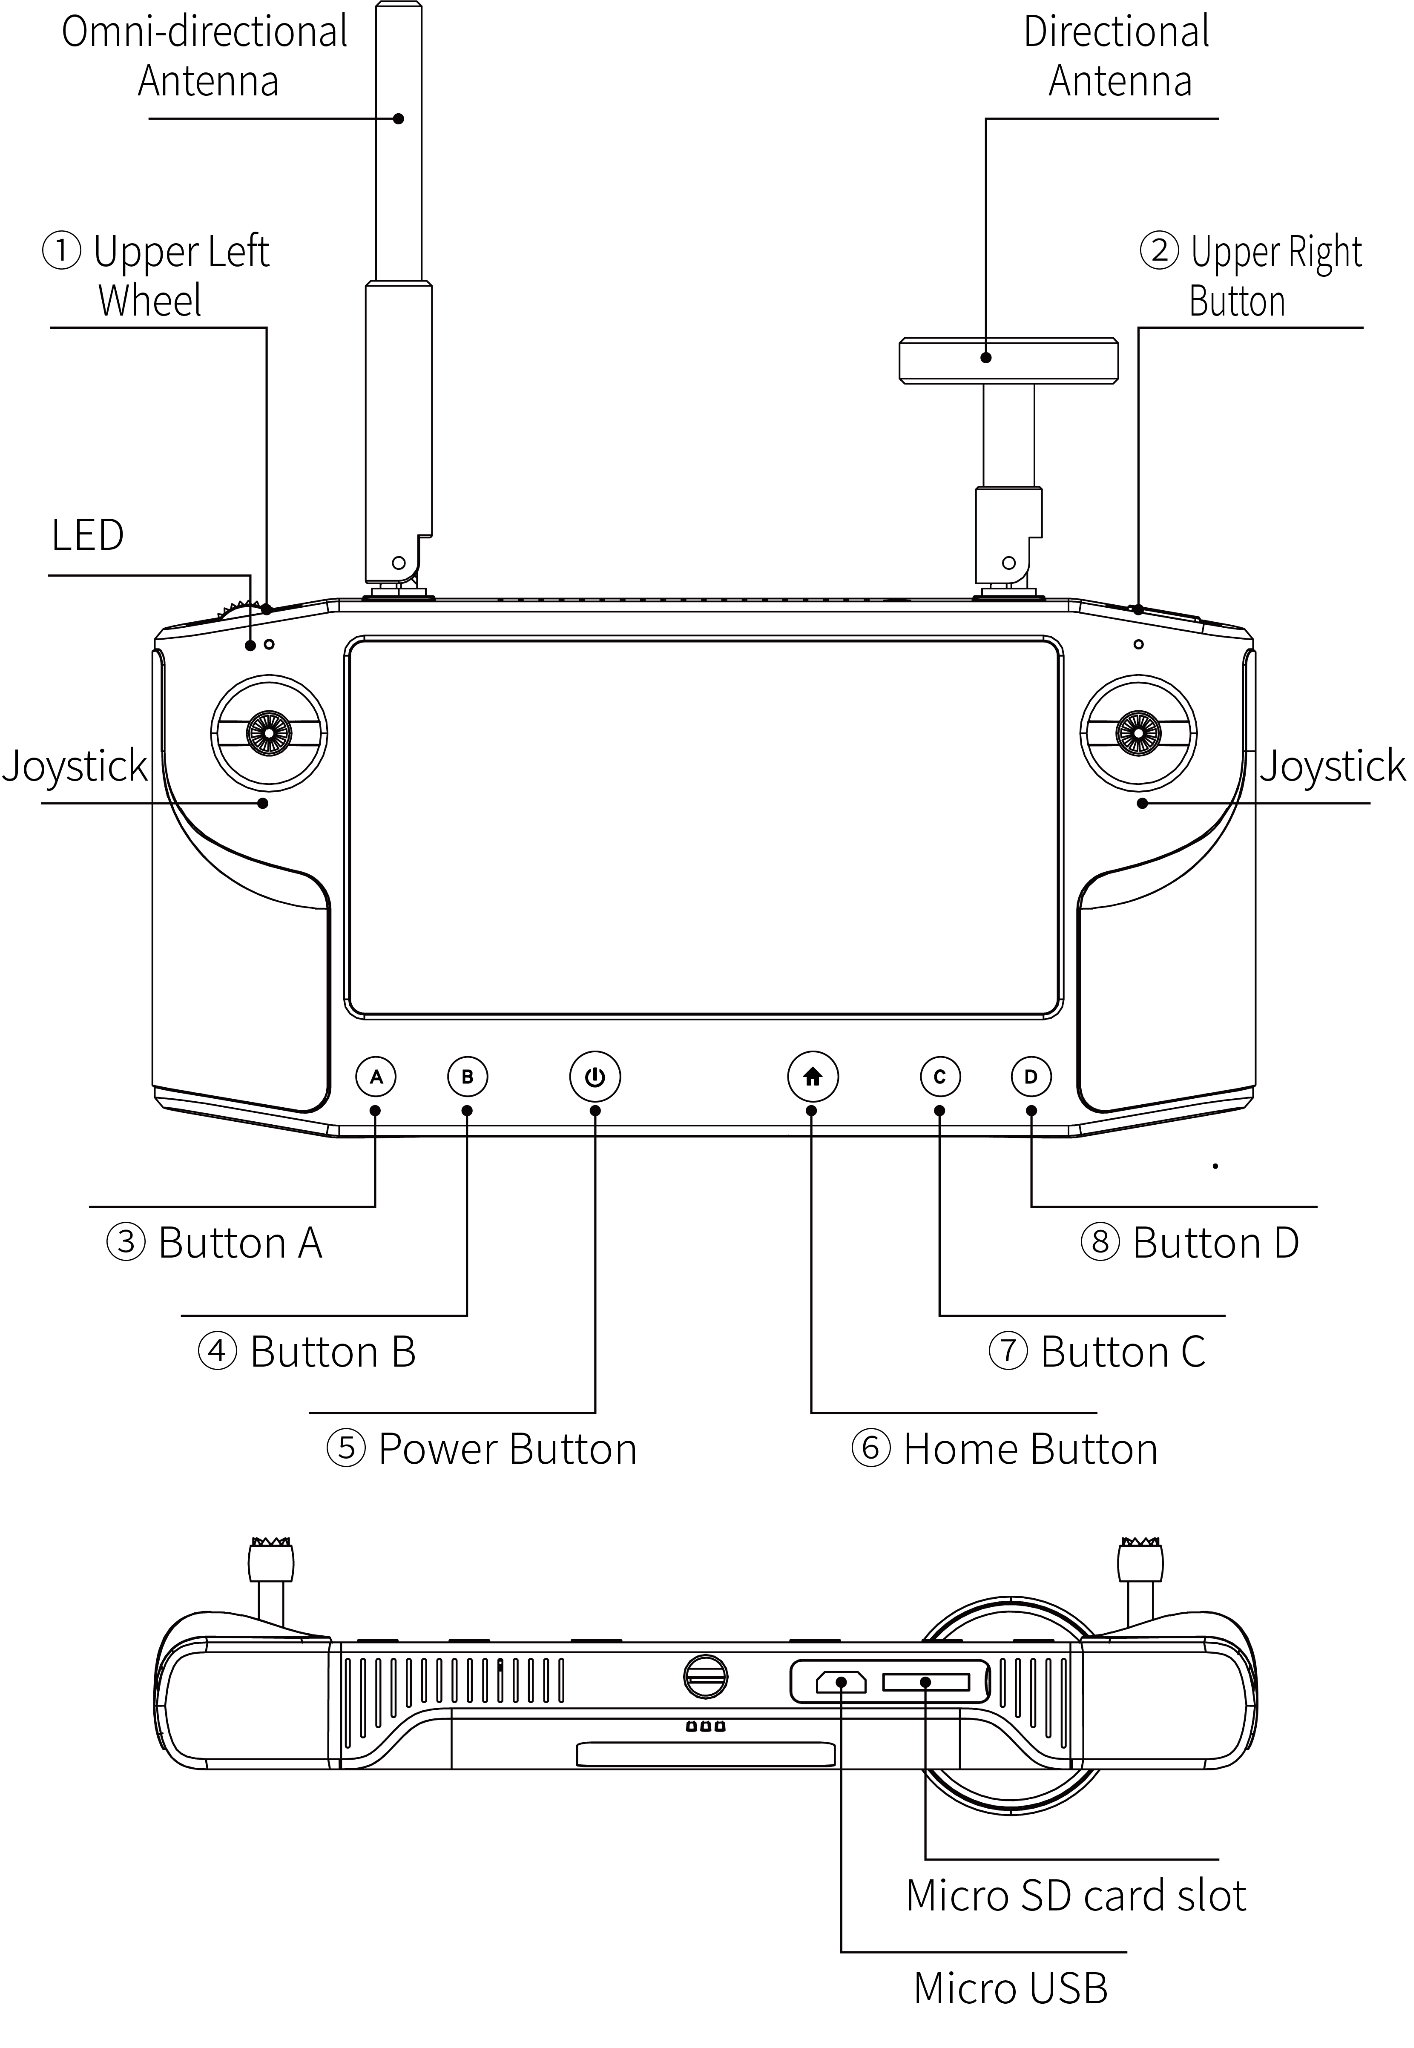
The Herelink is fitted with six programmable buttons and one scrolling wheel. By default, the buttons are configured as follows.
| **Button** | **Action** |
| ------------------ | ------------------------- |
| Upper Left Wheel | No Action |
| Upper Right Button | No Action |
| A | Altitude Hold Flight Mode |
| B | Loiter Flight Mode |
| Home | RTL Mode |
| C | Auto |
| D | No Action |
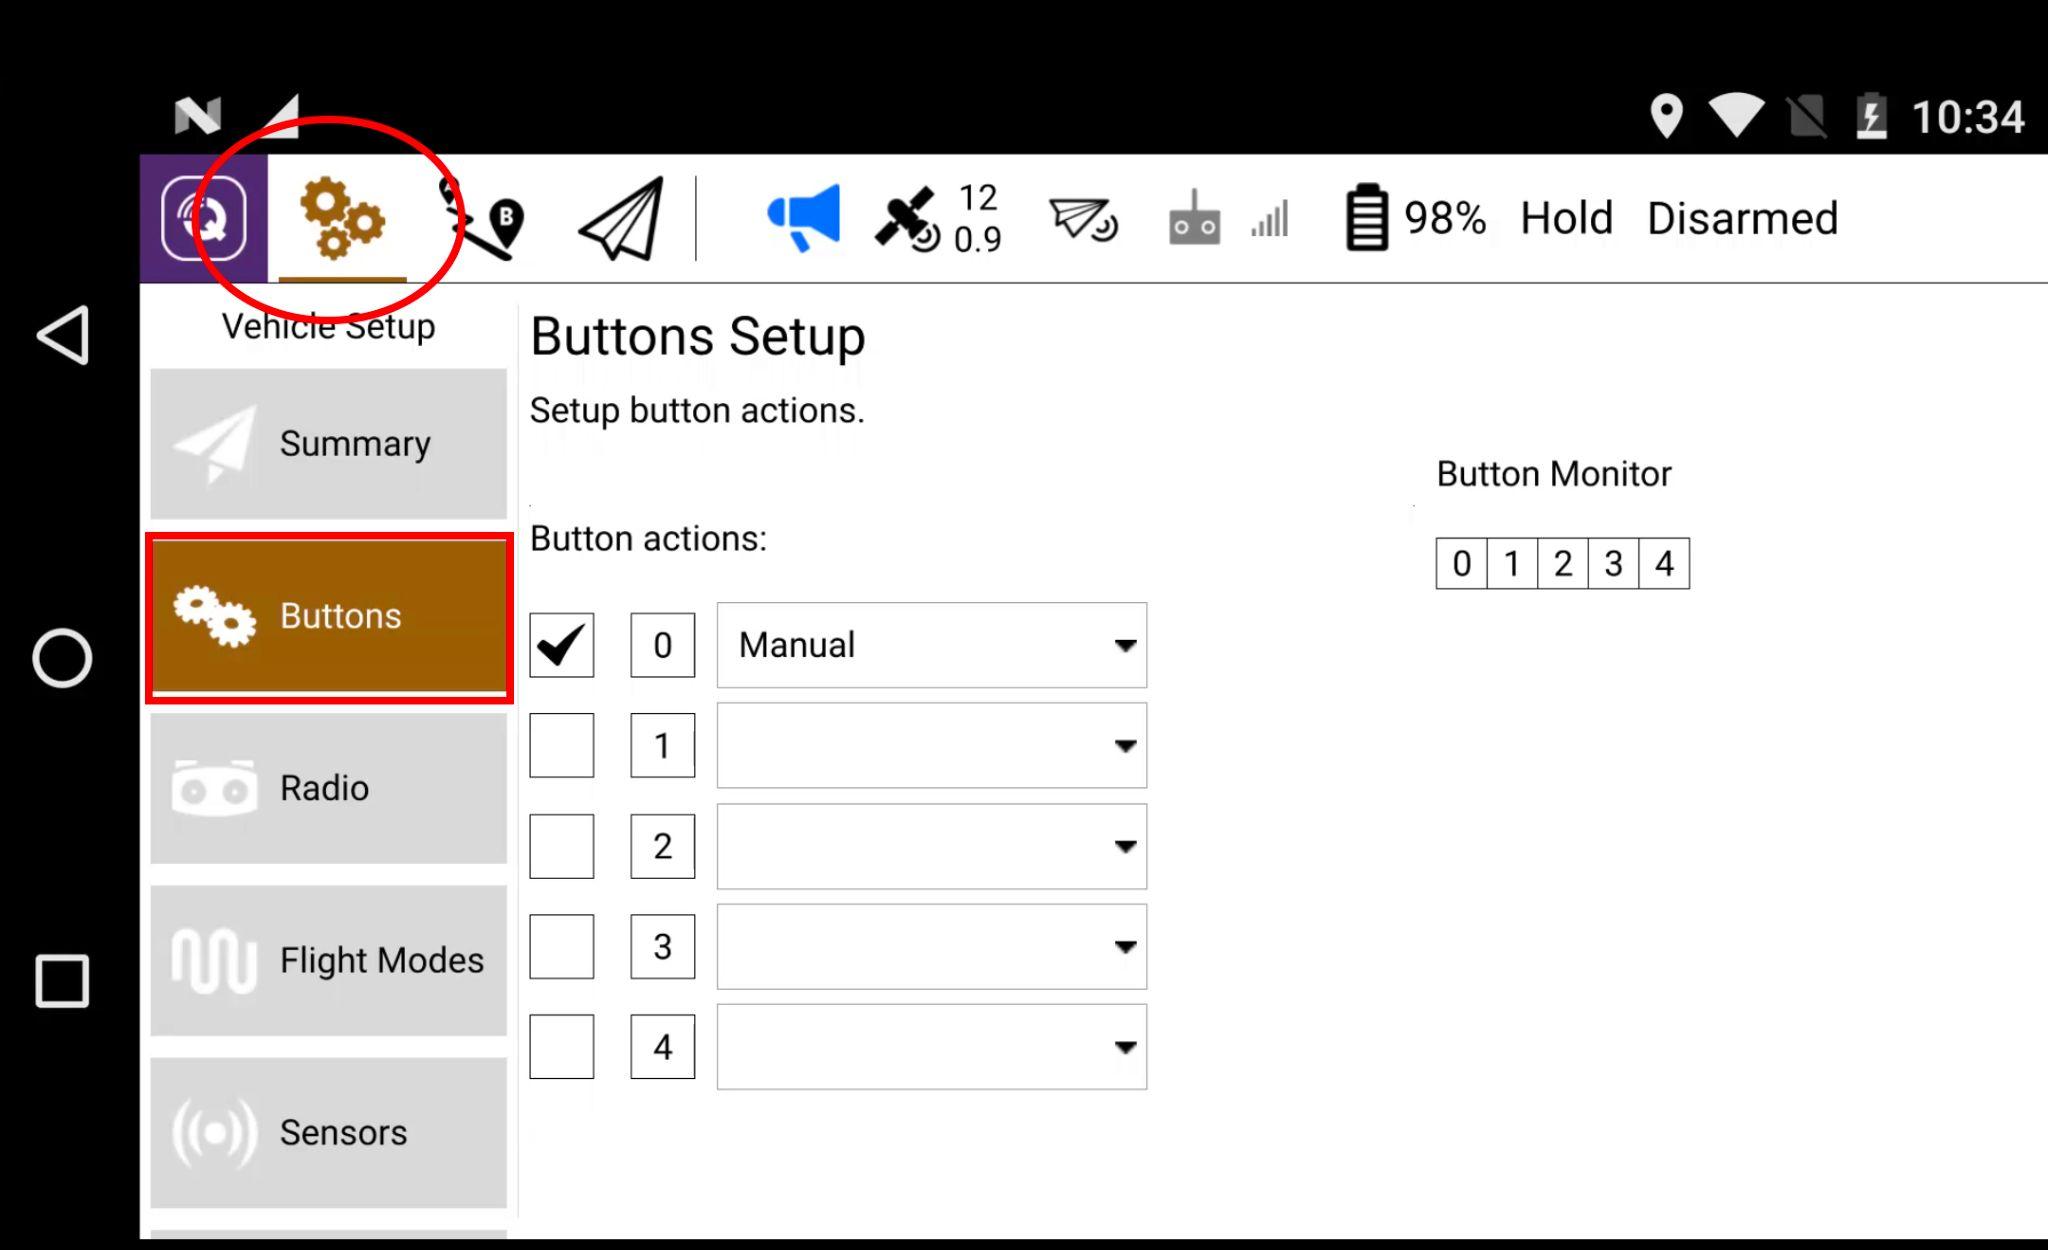
To configure the buttons, open QGC, go to “vehicle setup” and click the “Buttons”
{% hint style="warning" %}
Flight mode must be set only through the QGC buttons page, and not the SBUS signal in Herelink settings.
{% endhint %}
## Sharing data via Wi-fi Hotspot to Mission Planner
The Herelink controller is able to share data via a Wi-fi hotspot connection to broadcast the information to a PC or tablet, to be used with other flight control software such as Mission Planner. To share telemetry data using this method, the hotspot has to be turned on.
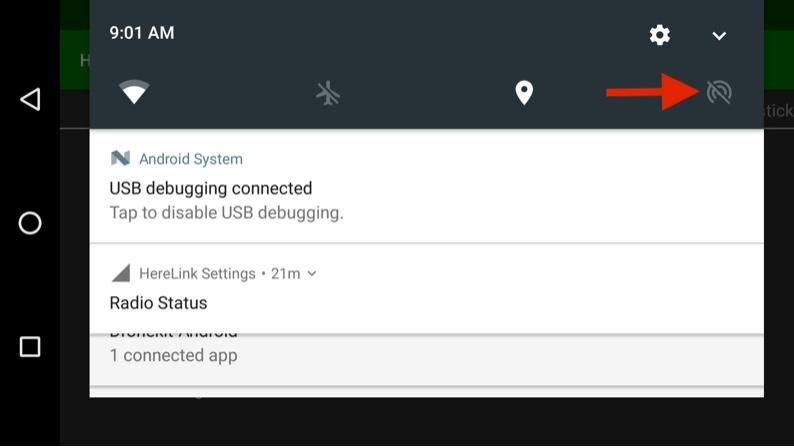
To turn on the Wi-fi hotspot, click the icon next to the arrow.
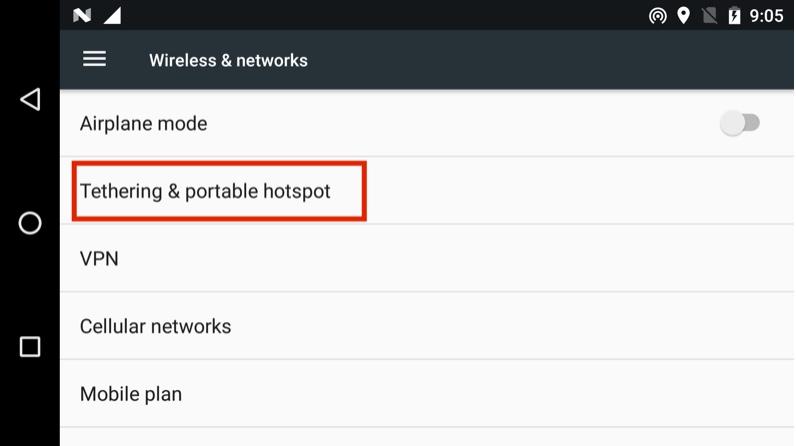
To access the wireless hotspot settings, press and hold the Wi-fi option in the notification drawer and select “Tethering & Portable Hotspot”.
You can set your hotspot name and set the password.
On the PC, connect the Wi-fi to the hotspot. Open Mission Planner and set the port to “UDP” and click “Connect”. Enter port “14550”
You are now connected to the same Wi-fi network as the Herelink.
## Sharing data via USB tethering
Connect with Mission Planner
To turn on the USB tethering, first plug in the Herelink to your PC with a USB cable.
Then, press and hold the icon next to the arrow.
To access the tethering settings, press and select “Tethering & Portable Hotspot”.
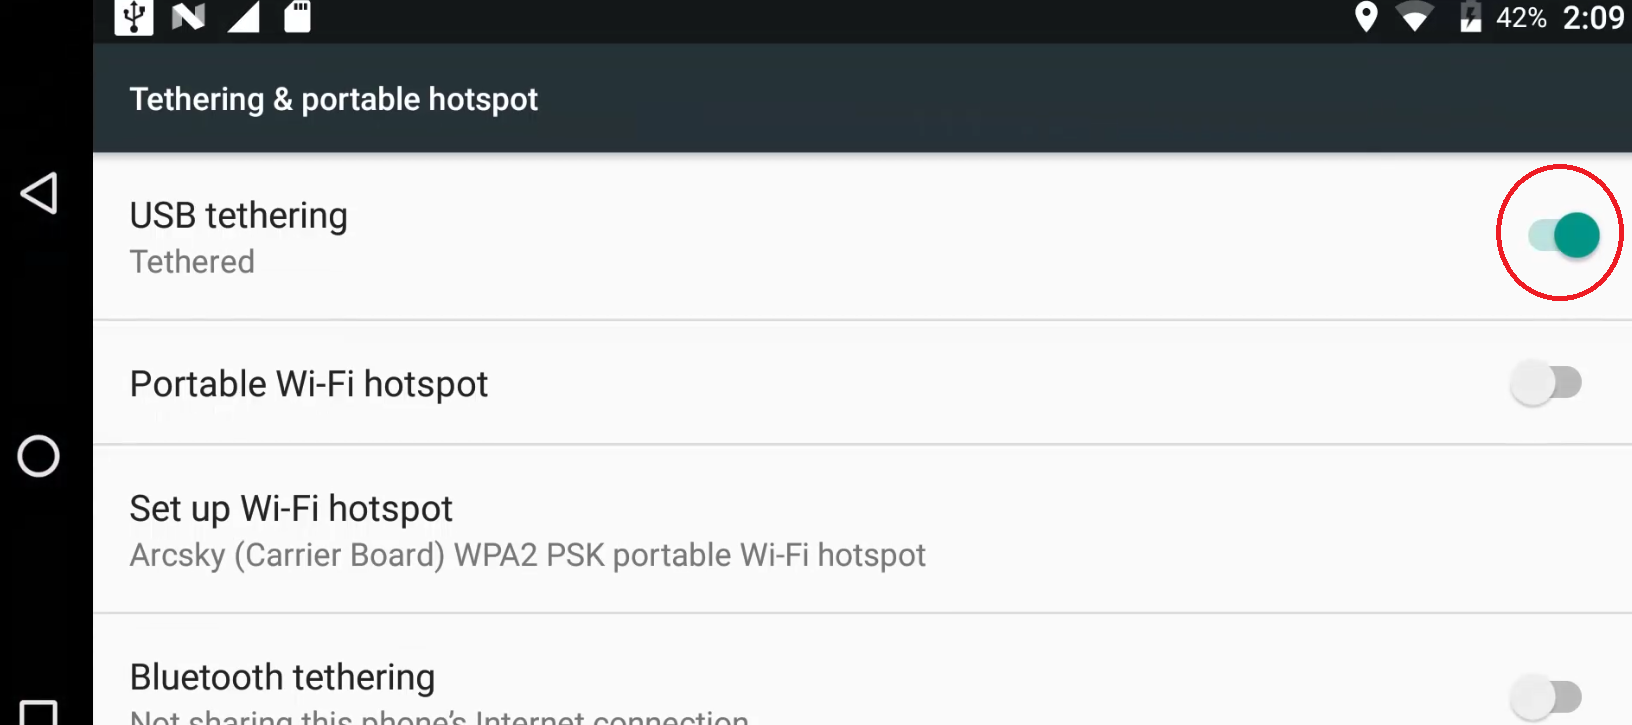
Turn on USB tethering.
Open Mission Planner on your PC.
Set the port to“UDPCL”.
Click "connect".
Enter the Herelink IP address: 192.168.42.129.
Enter Local port “14552”.
Click "connect"
 ## Configure Buttons
The Herelink is fitted with six programmable buttons and one scrolling wheel. By default, the buttons are configured as follows.
| **Button** | **Action** |
| ------------------ | ------------------------- |
| Upper Left Wheel | No Action |
| Upper Right Button | No Action |
| A | Altitude Hold Flight Mode |
| B | Loiter Flight Mode |
| Home | RTL Mode |
| C | Auto |
| D | No Action |
To configure the buttons, open QGC, go to “vehicle setup” and click the “Buttons”
## Configure Buttons
The Herelink is fitted with six programmable buttons and one scrolling wheel. By default, the buttons are configured as follows.
| **Button** | **Action** |
| ------------------ | ------------------------- |
| Upper Left Wheel | No Action |
| Upper Right Button | No Action |
| A | Altitude Hold Flight Mode |
| B | Loiter Flight Mode |
| Home | RTL Mode |
| C | Auto |
| D | No Action |
To configure the buttons, open QGC, go to “vehicle setup” and click the “Buttons”
 {% hint style="warning" %}
Flight mode must be set only through the QGC buttons page, and not the SBUS signal in Herelink settings.
{% endhint %}
## Sharing data via Wi-fi Hotspot to Mission Planner
The Herelink controller is able to share data via a Wi-fi hotspot connection to broadcast the information to a PC or tablet, to be used with other flight control software such as Mission Planner. To share telemetry data using this method, the hotspot has to be turned on.
To turn on the Wi-fi hotspot, click the icon next to the arrow.
{% hint style="warning" %}
Flight mode must be set only through the QGC buttons page, and not the SBUS signal in Herelink settings.
{% endhint %}
## Sharing data via Wi-fi Hotspot to Mission Planner
The Herelink controller is able to share data via a Wi-fi hotspot connection to broadcast the information to a PC or tablet, to be used with other flight control software such as Mission Planner. To share telemetry data using this method, the hotspot has to be turned on.
To turn on the Wi-fi hotspot, click the icon next to the arrow.
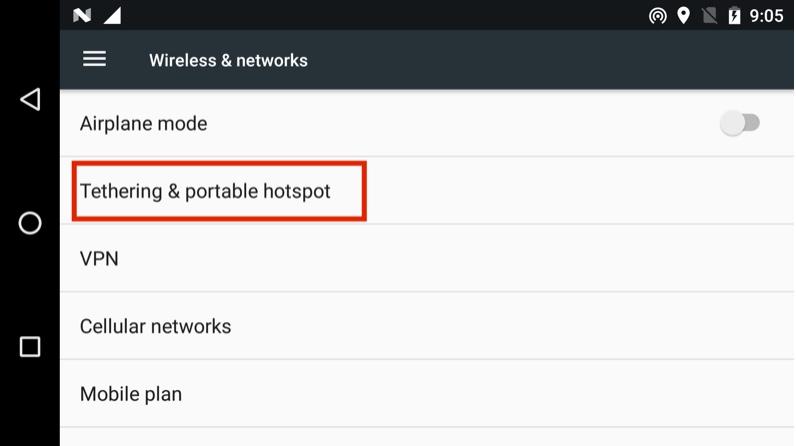
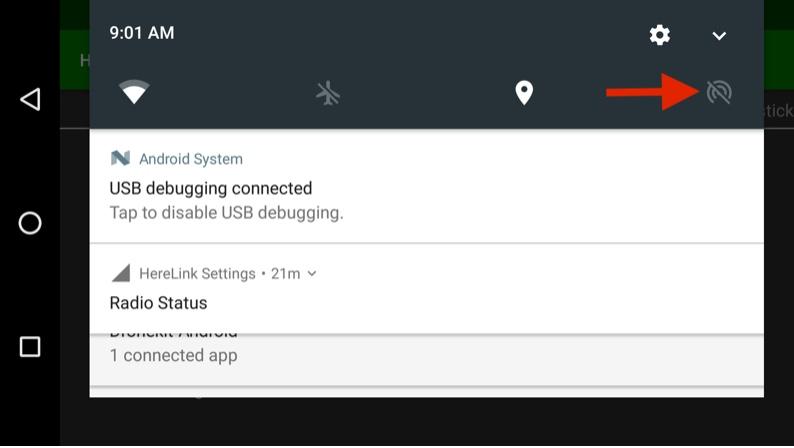 To access the wireless hotspot settings, press and hold the Wi-fi option in the notification drawer and select “Tethering & Portable Hotspot”.
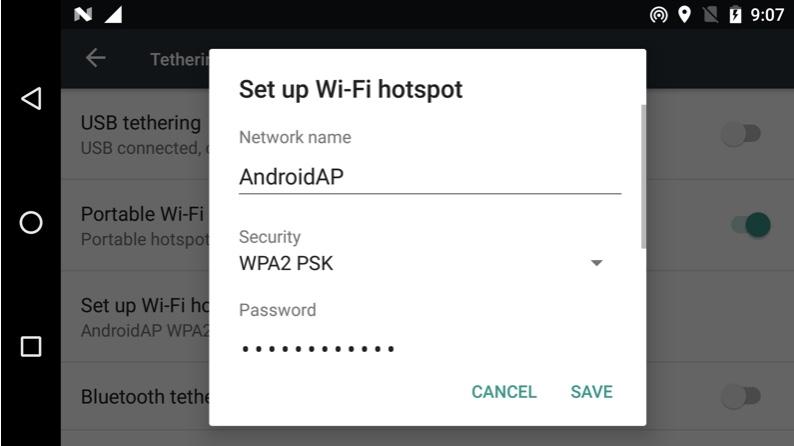
 You can set your hotspot name and set the password.
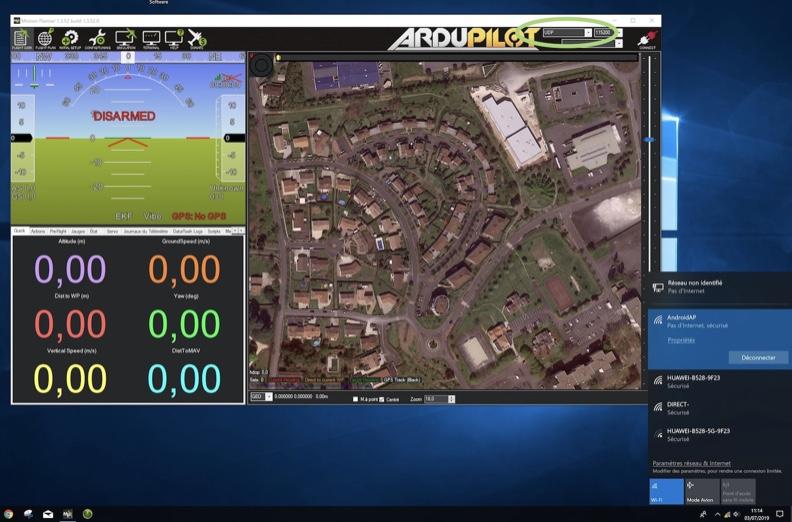
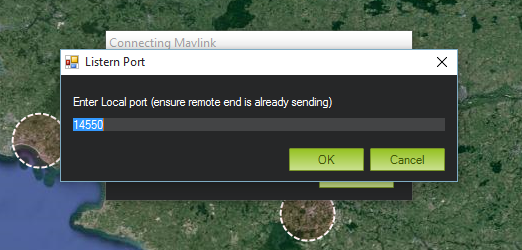
 On the PC, connect the Wi-fi to the hotspot. Open Mission Planner and set the port to “UDP” and click “Connect”. Enter port “14550”
 You are now connected to the same Wi-fi network as the Herelink.
## Sharing data via USB tethering
Connect with Mission Planner
To turn on the USB tethering, first plug in the Herelink to your PC with a USB cable.
Then, press and hold the icon next to the arrow.
You are now connected to the same Wi-fi network as the Herelink.
## Sharing data via USB tethering
Connect with Mission Planner
To turn on the USB tethering, first plug in the Herelink to your PC with a USB cable.
Then, press and hold the icon next to the arrow.
 To access the tethering settings, press and select “Tethering & Portable Hotspot”.
 Turn on USB tethering.
 Open Mission Planner on your PC.
Set the port to“UDPCL”.
Click "connect".
Enter the Herelink IP address: 192.168.42.129.
Enter Local port “14552”.
Click "connect"
Open Mission Planner on your PC.
Set the port to“UDPCL”.
Click "connect".
Enter the Herelink IP address: 192.168.42.129.
Enter Local port “14552”.
Click "connect"