Herelink Setup and X55 Configuration (Single Operator)
Note: These steps are only necessary if you did not purchase the ILX-LR1 package through Arcsky with an X55 system. In that case, they will already have been performed by Arcsky and things will be pre-configured.
Turn on the Herelink, go into the Herelink settings, click on the BUTTONS tab, create a new configuration, and name it something you’ll remember.
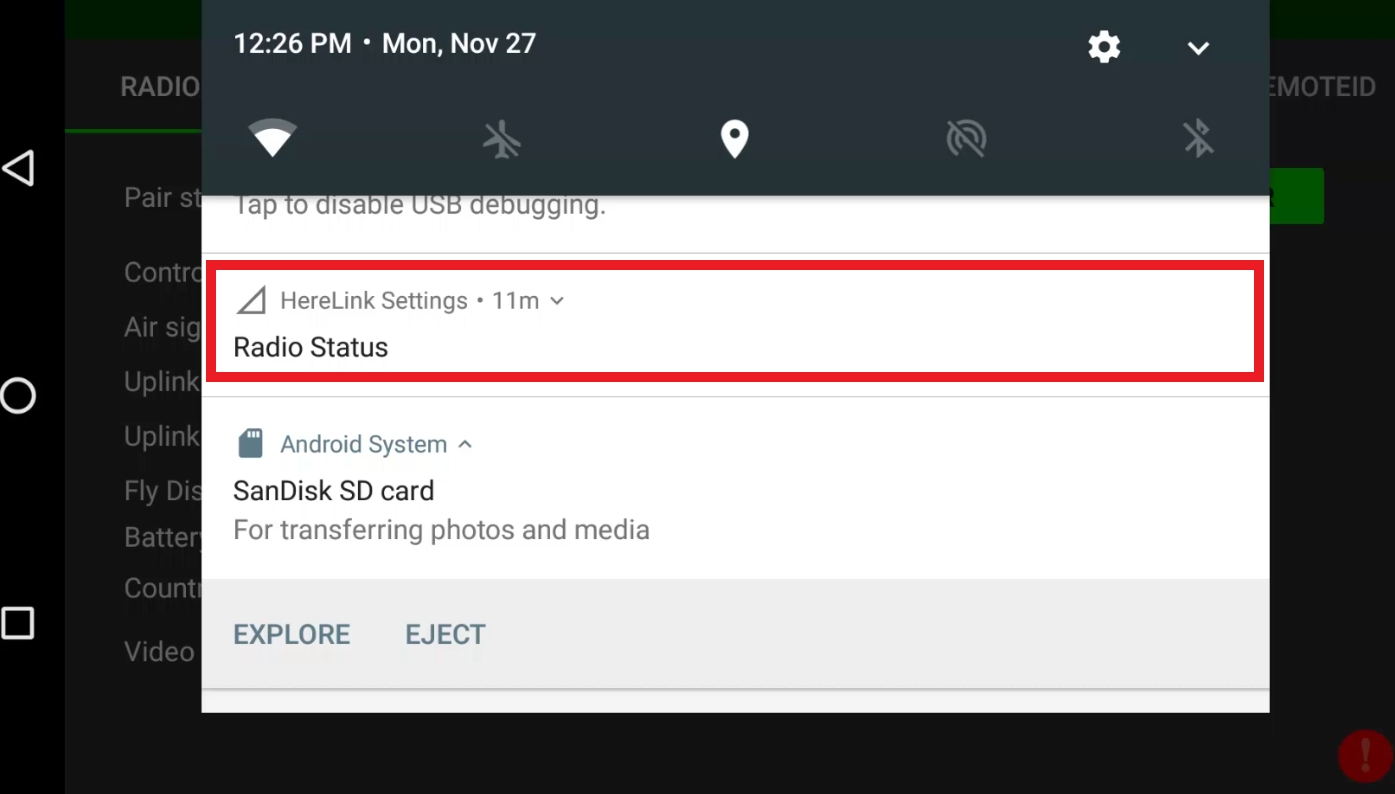

Assign the CAM short press button to channel 8, and make sure your settings match the screenshot below before hitting “SAVE”.
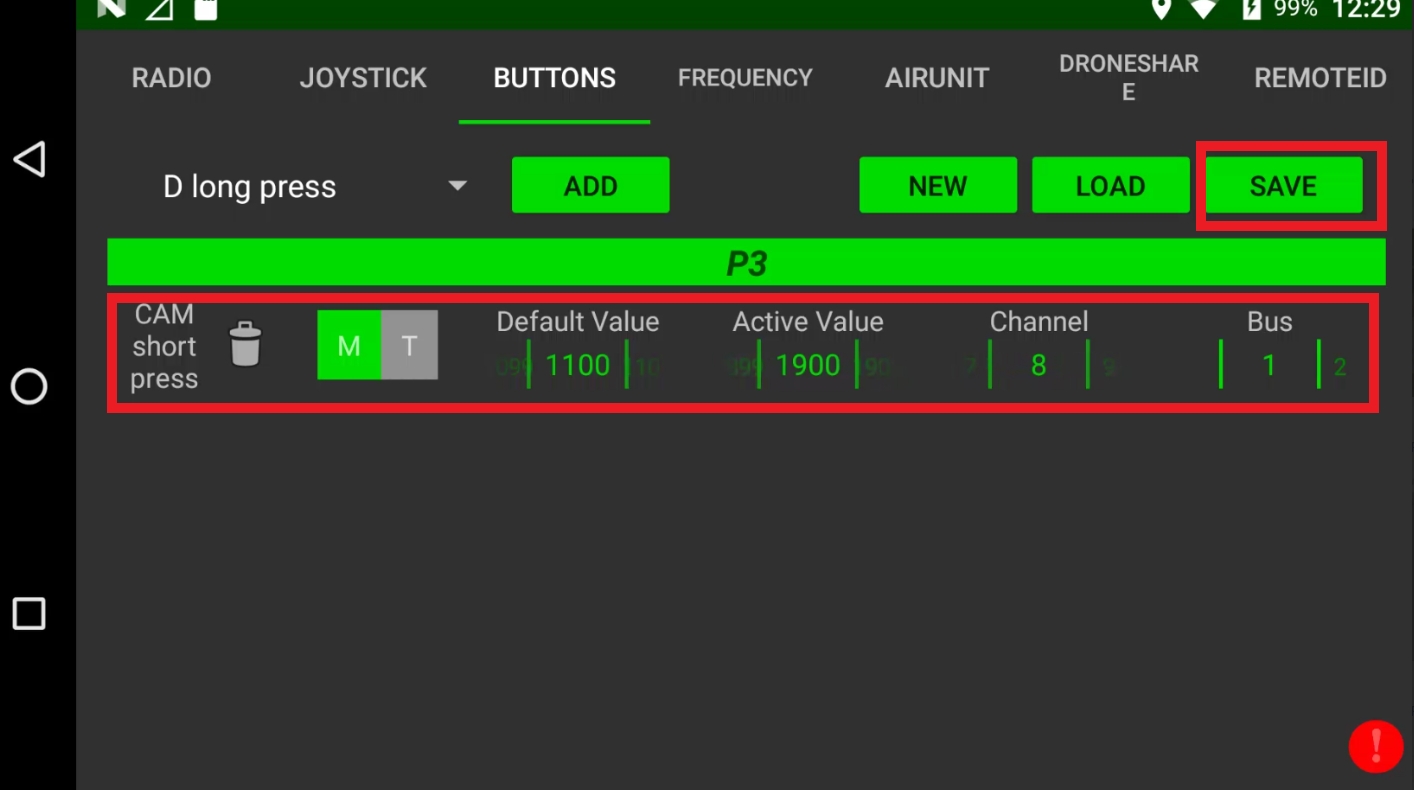
Go to the “JOYSTICK” tab and assign the wheel (W) channel to channel 6, with a deadzone of 20, and reverse the channel, then click “SAVE”.
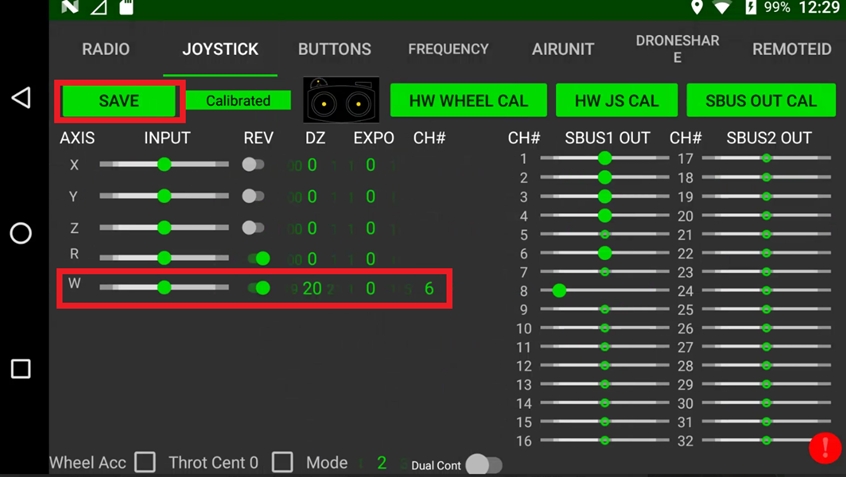
Make sure that the CAM button is not assigned to other functions such as flight modes in QGC. By default, this button is not assigned to any functions.
Power on the X55, and wait 1 minute for the X55 and the ILX-LR1 to initialize - the camera will move during the initialization process.
Open the QGC app in the Herelink and wait for the parameters to load. Make sure you are using the “Stream 2” video source and that you can see the output of the ILX-LR1.

Click on the gear icon, go to the parameters tab, click on “SERIAL”, then change “SERIAL3_BAUD” to 921600 and click "SAVE". Also, make sure “SERIAL3_PROTOCOL” is set to MAVLink2 (2).

These parameters are listed below for reference.
SERIAL3_BAUD
921600
SERIAL3_PROTOCOL
2 (or MAVLink2)
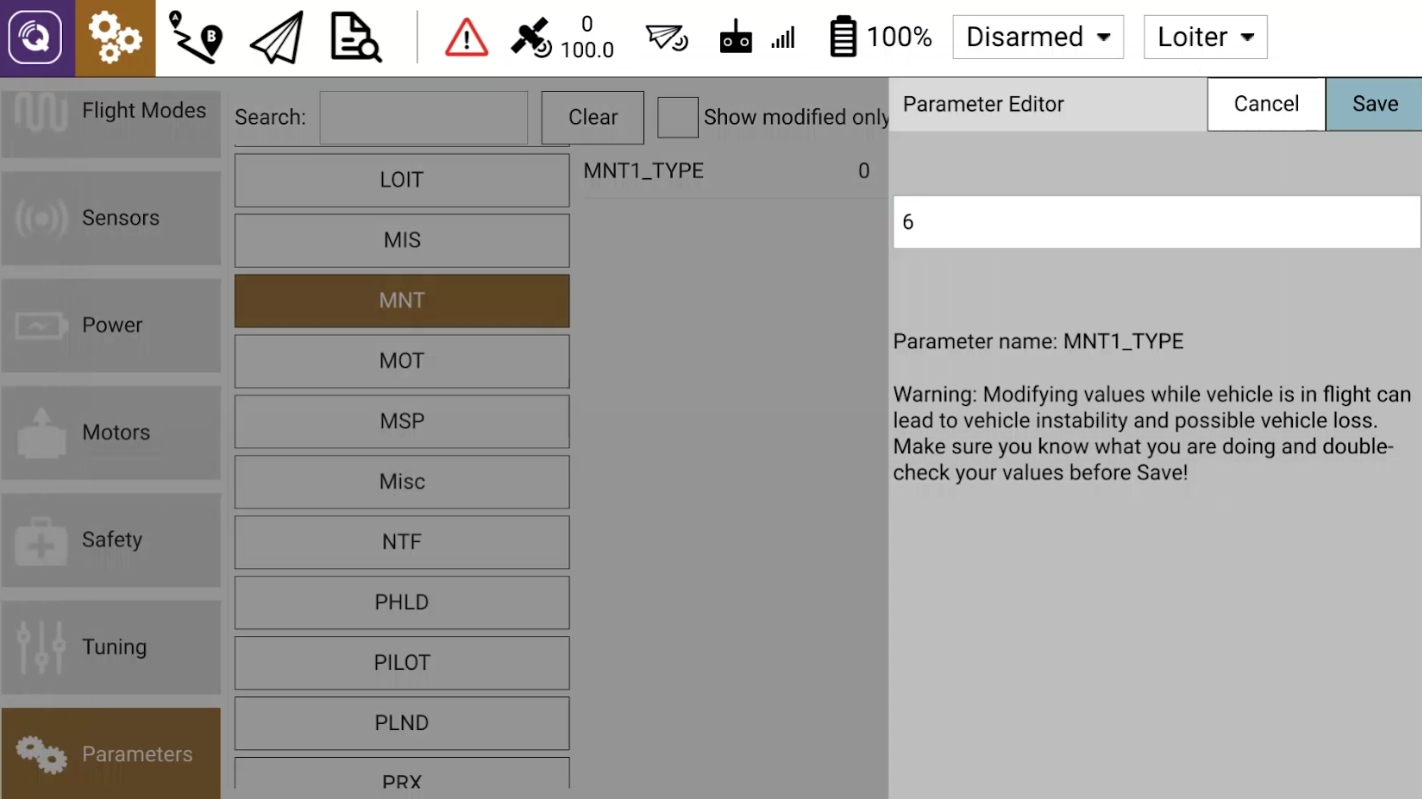
Find the MNT1_TYPE parameter, and set it to 6, then click “Save”.
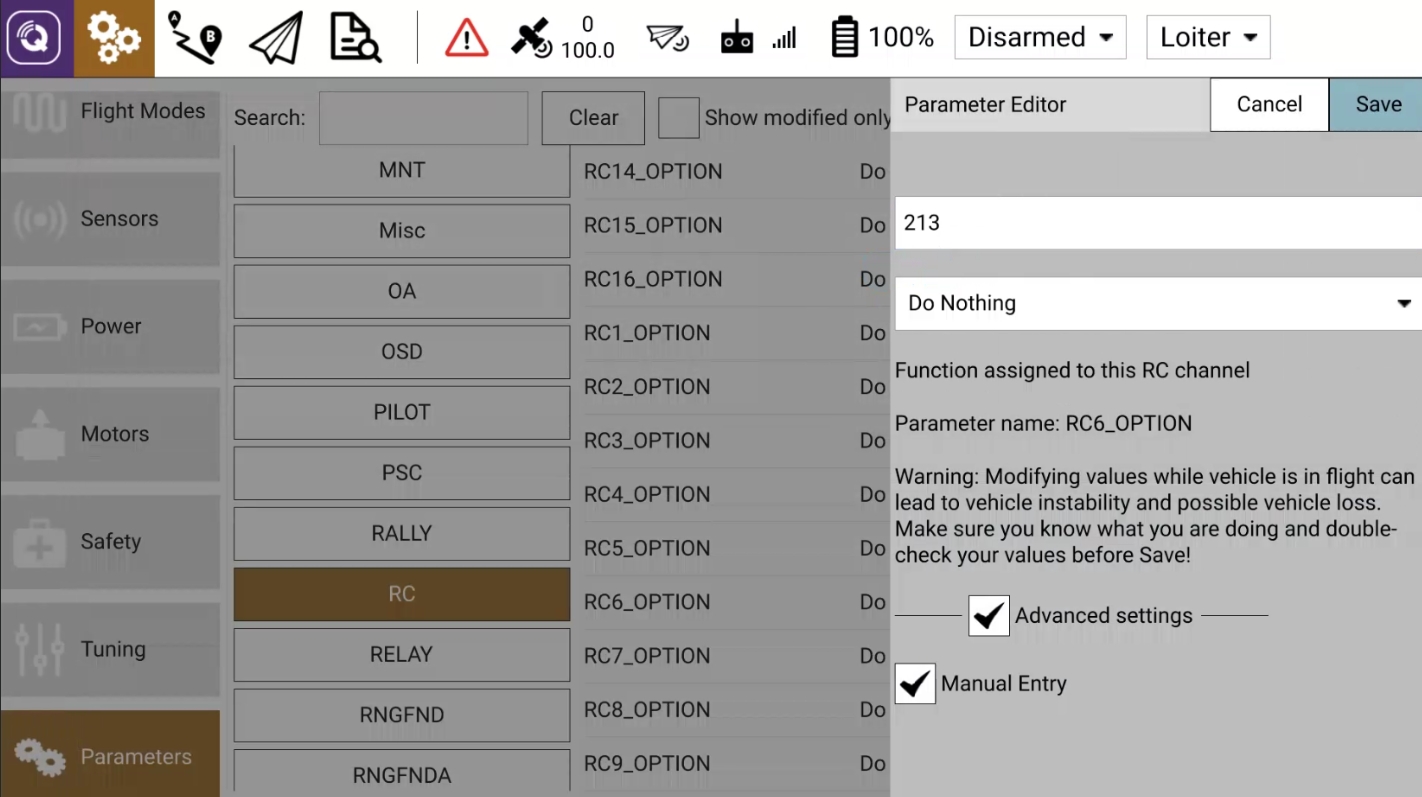
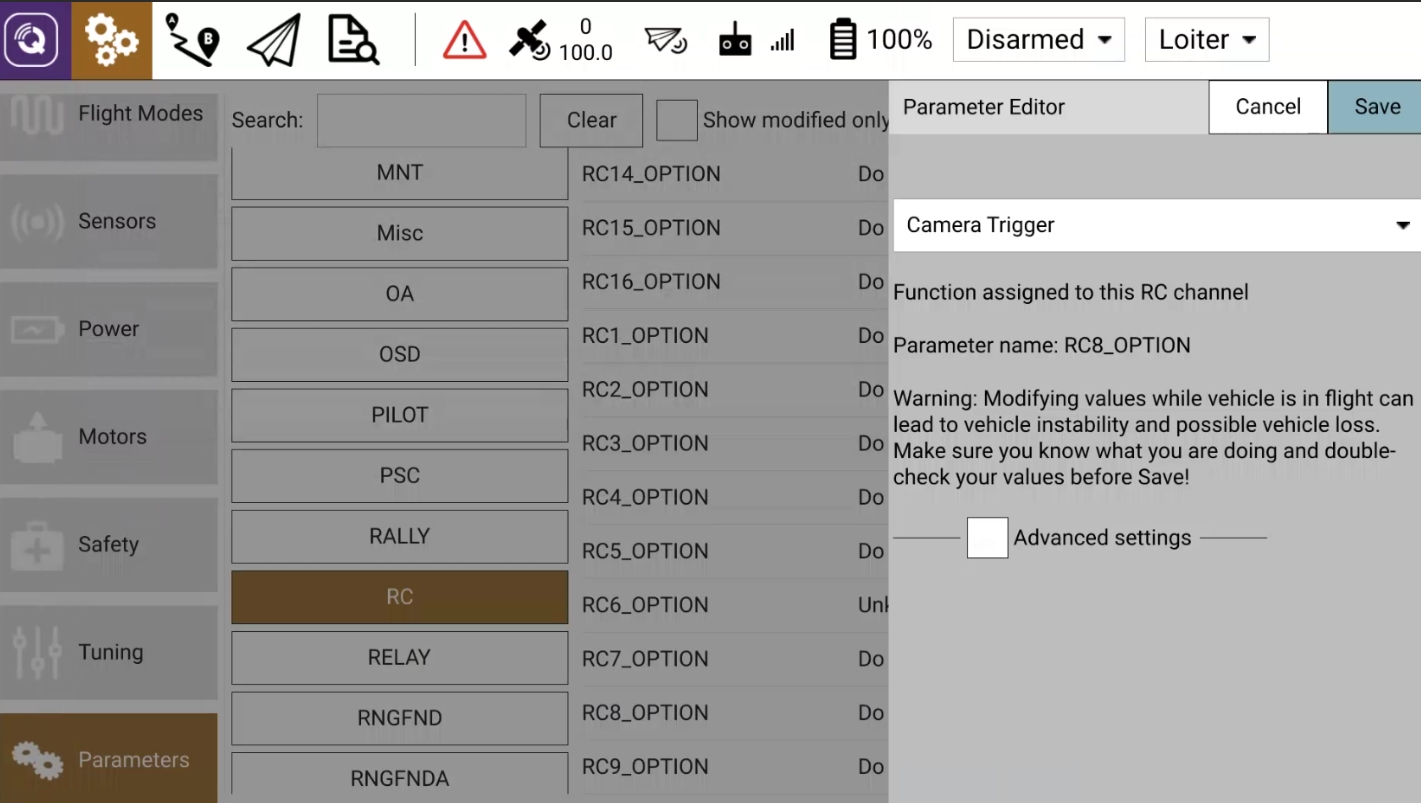
Find the “RC” category and set the RC6_OPTION to 213 and the RC8_OPTION to “Camera Trigger”. You may have to search for RC in the search bar to find these. For RC6_OPTION, you will have to manually type in 213.

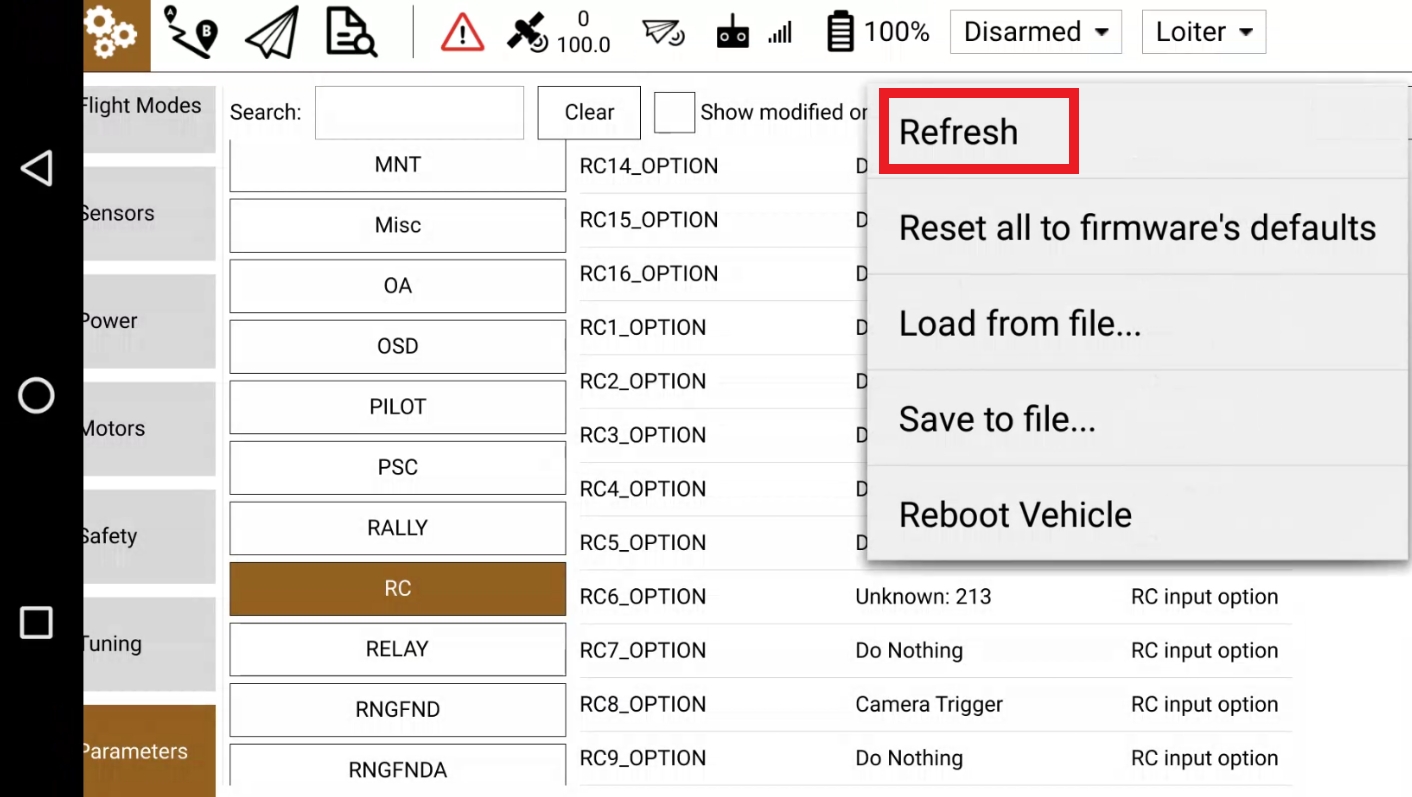
Click the “Tools” button in the top right corner, and select “Refresh”, then wait for the parameters to refresh. It is recommended to go back into the fly view (paper airplane icon) then back to the Parameters tab before proceeding.
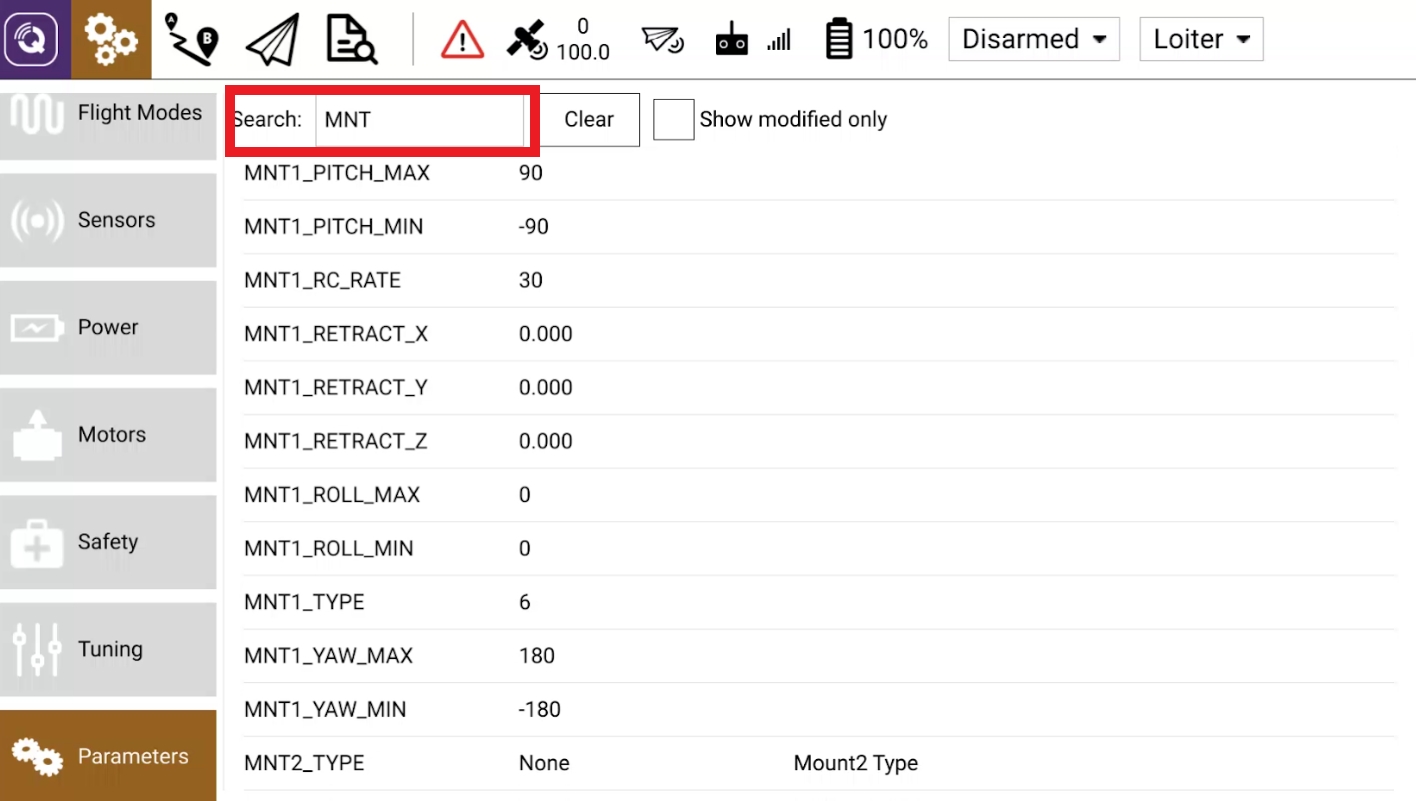
Search for “MNT” and make sure that the parameters in the following table are set appropriately.
MNT1_DEFLT_MODE
3
MNT1_LEAD_PITCH
0
MNT1_LEAD_RLL
0
MNT1_NEUTRAL_X
0
MNT1_NEUTRAL_Y
0
MNT1_NEUTRAL_Z
0
MNT1_PITCH_MAX
90
MNT1_PITCH_MIN
-90
MNT1_RC_RATE
60
MNT1_RETRACT_X
0
MNT1_RETRACT_Y
0
MNT1_RETRACT_Z
0
MNT1_ROLL_MAX
0
MNT1_ROLL_MIN
0
MNT1_YAW_MAX
180
MNT1_YAW_MIN
-180
Set the CAM1_TYPE to 5
Click again on the “Tools” button and click “Reboot Vehicle”. Then, close QGC on the Herelink and re-open the application and wait for all parameters to load.

You should be able to do pitch movements of the camera by moving the wheel back and forth on the Herelink, and clicking the CAM button on the Herelink should cause the camera to take a picture. If this does not happen, you may have to completely power down the system and power it back up.
You can change the settings of the camera in a few different ways. See the “How to Change Camera Settings” section of this document for more information.
Due to the limited number of switches and buttons available on the Herelink controller, you can only move the camera one axis at a time in single-operator mode, unless you have MavCam installed (standard on complete packages purchased through Arcsky).
Setup completed.
Last updated