Dual Operator Mode Setup
Due to the limited amount of switches and buttons available on the Herelink controller, and to prevent distraction of the pilot in command, you may want to use a dual-operator mode, where one pilot controls the aircraft with the master controller, and another operator controls the gimbal and camera with a slave controller. Please make sure you have first configured and tested basic functionality on the system using the above steps before setting up dual operator mode.
To operate in dual operator mode, another Herelink controller is required.
Follow these steps to set it up.
Make sure the X55 is not powered on. Turn on the Herelink controller that is paired with the X55. This controller will be used as a master controller.
Go to Herelink settings, and turn on the hotspot. For more information about how to set up a hotspot, please refer to the X55 Operation Manual.

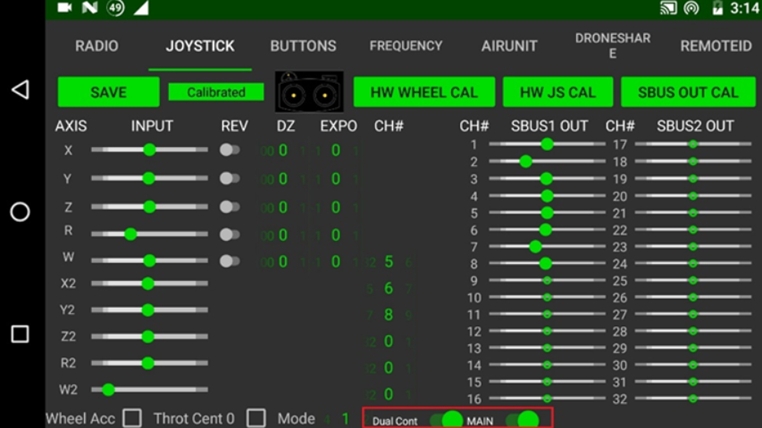
Go to the Joystick tab, turn on the “Dual Cont” and “Main”, and click “SAVE”. You may have to restart the controller before proceeding, if it directs you to do so.
Go to the radio tab, and set the video sharing to “Enable”.

Turn on the second Herelink controller - this controller is used as a slave controller.
Connect the slave controller to the master controller’s hotspot (a WiFi connection).
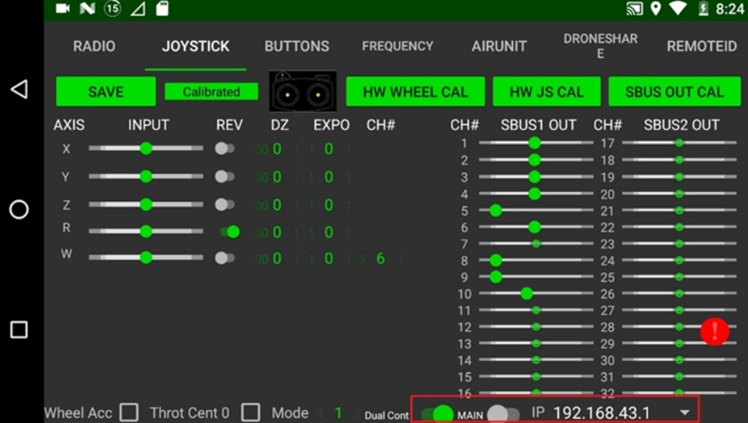
After the WiFi is connected, go to the Herelink settings Joystick tab, turn on the “Dual Cont”, and select 192.168.43.1 (default). (This IP target is the IP of the master remote). Clink “SAVE” and restart the slave controller.
Once the slave controller is turned back on, connect the slave controller to the master controller WiFi network again.
Once connected, open the QGC app in the slave controller, go to the general tab, and uncheck all selections in AutoConnect.

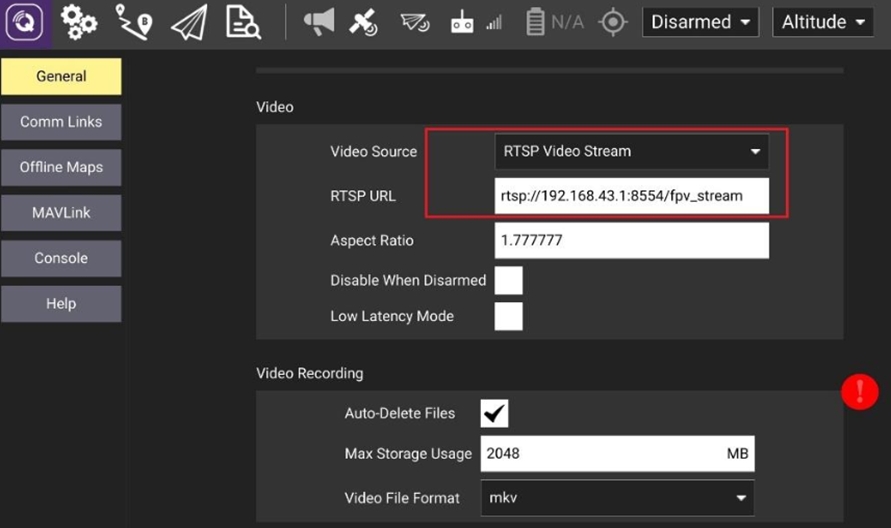
Set “Video Source” to RTSP Video Stream and “RTSP URL” to rtsp://192.168.43.1:8554/fpv_stream.
• In the JOYSTICK tab of the slave controller, make the following settings and click “SAVE”.

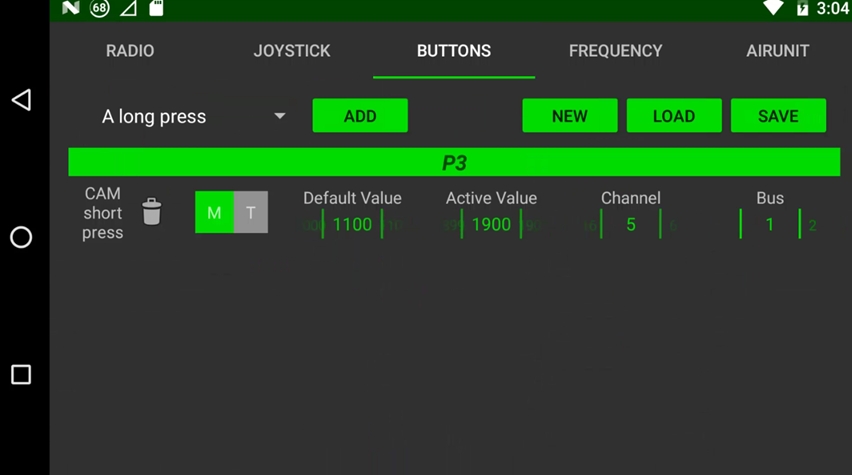
• In the BUTTONS tab of the slave controller, make a new configuration, assign the CAM short press button as shown below, and click “SAVE”.
• Now go back to the master controller. Go to the Herelink settings, Joystick tab. You should be able to set the slave controller’s joystick values, set W to Ch 5, X2 to Ch 6, Y2 to Ch 8 and W2 to Ch 7. Click “SAVE”.
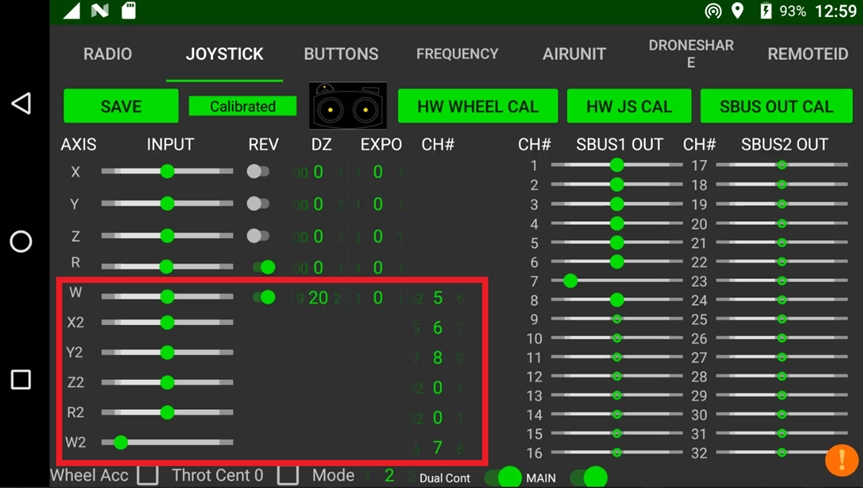
Power on the X55 and allow up to 1 minute for the system to initialize.
Using the master controller, open the QGC app. After the parameters have downloaded and you are connected to the X55, go into the RC section of the Parameters tab. Set the RC6_OPTION, RC7_OPTION, and RC8_OPTION as shown in this screenshot.
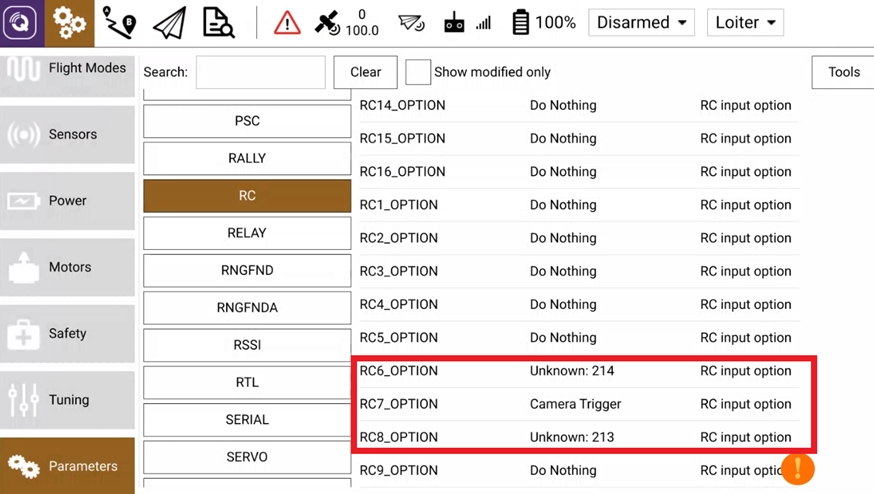
Reboot the X55 (via the “Tools” button).
To verify that controls are working properly, use the slave controller and make sure that you can pitch and yaw the camera using the right joystick, and that pressing the CAM button takes a picture (you should hear the click).
In the slave controller, open up the QGC application and make sure you can see the video output on the fly view.
Setup completed.
Last updated